Quick & Easy DIY Balloon Garland for a Girl Baby Shower
We're so thrilled to be celebrating the arrival of your beautiful baby girl! We've taken the headache away by creating this easy to assemble kit! Below are instructions and tips to setting up your Balloon Garland for your Baby Shower!
This kit only takes 45-60 minutes to set up! And it includes EVERYTHING you need for a balloon garland!
ITEMS YOU WILL NEED:
- 1 Malibu Moments/Effortless Events Balloon Garland Kit for Girl (on Amazon)
- Includes color coordinated balloons in various sizes
- Includes balloon garland strip tape
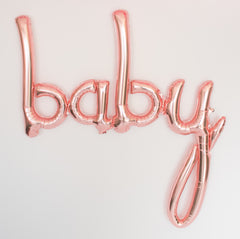
- Includes rose gold "baby girl" script letter balloons
- Includes balloon hand pump (no helium required!)
- 1 package of 3M Command Hooks (Small - holds up to 1 lbs)
- Scotch tape or string to hang "baby girl" letter balloons
HOW TO SET UP YOUR MALIBU MOMENTS BALLOON GARLAND:
STEP 1: Inflate and tie all the balloons with the dual action air hand pump included in your kit.
- For 5 inch balloons, use 4 full pumps of air to inflate. Then tie.
- For 11 inch balloons, use 20 full pumps of air to inflate. Then tie.
- To make the confetti balloons stick on the 11 inch balloons, simply roll the balloon on a carpet, shirt, hair, etc. to create static. Then slowly roll the confetti to evenly distribute the confetti.

11 inch balloons inflated shown below:

5 inch balloons inflated shown below:

STEP 2: Inflate rose gold "baby girl" foil letter balloons with hand pump.
- Be careful and do not over inflate, as it will damage the balloon.
- Once inflated, set these balloons aside for now.

STEP 3: Lay your garland strip on the floor.
- To assemble the balloon garland, lay the decorating strip flat out on the floor. Be sure to leave at least 26 holes (or 12 inches) empty at one end in order to hang the garland. There will be a lot extra on the other end, you can cut that off later.

STEP 4: Put the 11 inch balloons along the balloon strip.
- Scatter the 11 inch balloons along the strip, alternating between the colors.
- Place the 11 inch balloons in ever other 16th hole for even distribution.
- To insert them, pinch the lip of the tied balloon together and pull the knot of the balloon neck completely through the hole. (refer to image in STEP 5 for example)

STEP 5: Fill with 5 inch balloons
- Fill in the gaps with 5 inch balloons on the balloon garland strip.
- Be sure to alternate between the colors, pulling the knot of the balloon neck completely through the hole.
- For a full, tight balloon garland as seen in the image, fill in every other hole on the strip.
- For loose, longer balloon garland, you can skip 2-3 holes if you feel as though the balloons are too tight for your liking.

STEP 6: Adding your final touches!
Now, your balloon garland should look like this image below:

- To finalize your baby shower, don't forget to use string, ribbon, or double sided scotch tape to hang your "baby girl" letter balloons!
OPTIONAL & NOT INCLUDED in your kit: Green leaves and flowers.
- To add a "tropical" twist to your party, feel free to add tropical flowers and leaves into your balloon garland! The balloons were able to hold the flowers and leaves in without any additional tape or string!

ALL DONE!
We hope you have a wonderful baby shower! ❤
XOXO,
❤ Jenn W.